Create code signing certificates for React Native
Author: Gergő Fándly
Date: 2024-08-26
When you’re building a React Native application for iOS or Android, you need to sign your app with a code signing certificate. This is a requirement for both platforms, and without it, you won’t be able to distribute your app to the App Store or Google Play.
In this guide I’m going to show you how you can obtain these code signing certificates for both platforms.
Android
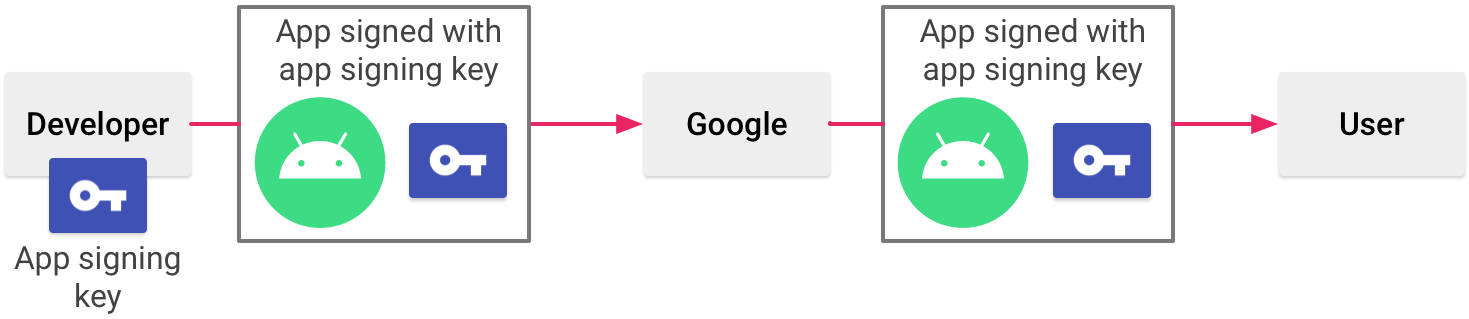
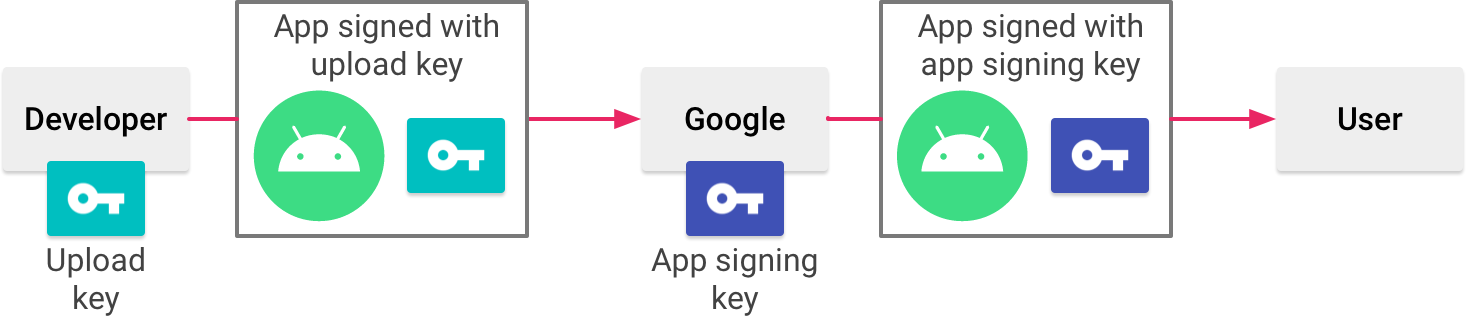
Nowadays you don’t create the certificate used for the actual distribution of the app, you will only create an upload key. This key is used to sign the app bundle that you upload to the Play Store, and then the store will re-sign your application for distribution. But the process is the same as before, and if you won’t like to use the Play Store for distribution, you can create signed bundles with this method. Note though that for newly created applications you must use android app bundles (.aab files) and you have to use a separate upload key.
To create a code signing certificate first of all we need a secure password that is going to protect it. We can generate one using any online tool (like this one) or using openssl:
openssl rand 64 | openssl base64 -A
This command will create 64 random bytes which we then encode as a base64 string. The output will be something like bmsaJ/0mE+16Gk2CjuakMtRD9vDxsm9kVzE4IXuISZXhNb9CjXYOlANdxX6wGOaOlkYhuZTpOwBBxlvkRfcBgA==.
Now we can create the actual certificate using the keytool command:
keytool -genkey -keystore android-upload-key.keystore -alias upload-key -keyalg RSA -keysize 4096 -validity 365000
This will create a new keystore named android-upload-key.keystore, a 4096 bit RSA key inside it named upload-key and a certificate signed with that key. You will be asked to enter a keystore password (the one generated before) as well as some details about your organization. The certificate will expire after ~1000 years, but the expiration is not verified by android.
Save this file somewhere secure and note the password, since you won’t be able to recover either of them. In that case you will have to invalidate your upload key in Google Play and create a new certificate (which is still better than not being able to update your app anymore, which would be the case without upload keys).
iOS
To create an iOS code signing certificate, you have to be enrolled in the Apple Developer program. We will use openssl to create the certificate since I want the instructions to be cross platform.
-
First of all let’s create a working directory since we will have to work with multiple files:
mkdir ios-cert cd ios-cert -
Generate a certificate signing request (CSR)
openssl req -nodes -newkey rsa:4096 -keyout signing.key -out request.certSigningRequestThis command will generate a new 4096 bit RSA key and a certificate signing request. You will once again be asked to enter some details about your company. Use the same values as the ones provided for Apple, but the only important part should be the organizational unit (OU) which should be your developer team ID.
-
Not let’s get that CSR signed by Apple
- Log in to the Apple Developer portal
- Go to certificates
- Click on the plus button
- Select iOS Distribution
- Upload the generated
.certSigningRequestfile - Download the signed certificate (
ios_distribution.cer)
-
Convert the .cer file (in DER format) to PEM format
openssl x509 -in ios_distribution.cer -inform DER -out ios_distribution.pem -outform PEMWe need to have the certificate in PEM encoded form to create a PKCS#12 archive from the certificate and the key (think of it as an alternative for the keystore file of android).
-
Generate an export password that will secure the PKCS#12 archive
openssl rand 64 | openssl base64 -AThis will create a 64 byte long base64 encoded random password.
-
Create a PKCS#12 archive from the certificate and the private key
openssl pkcs12 -export -inkey signing.key -in ios_distribution.pem -out ios-signing-cert.p12When asked for a password, enter the password generated in the previous step.
-
Create provisioning profiles
For iOS distribution it’s not enough to sign the code, you will also need to create and use so called provisioning profiles. These profiles need to be created from the Apple Developer portal.
- Log in to the Apple Developer portal
- Go to Profiles
- Click on the plus button
- Select Distribution -> App Store
- Select the App ID you want to use
- Select the certificate you’ve just created
- Add a name for the provisioning profile. It can be anything you want, but decide on some naming convention to make your life easier later on.
- Download the generated profile and save it as
app.mobileprovision
Make sure to save the file with this exact name, since we will rely on it’s name when constructing the build pipeline. The provisioning profiles expire when the certificate used expires, but you will also need to recreate them in some other cases.
As a final step zip the provisioining profile(s) together:
zip provisioning-profiles.zip *.mobileprovision
And you’re done. You will need the .p12 archive, the password used to export it and the provisioning-profiles.zip file in the build pipeline.
Comments